Running the Segmentation Tool
Each time you want to run a classification on new imagery follow these steps.
Open Anaconda Prompt
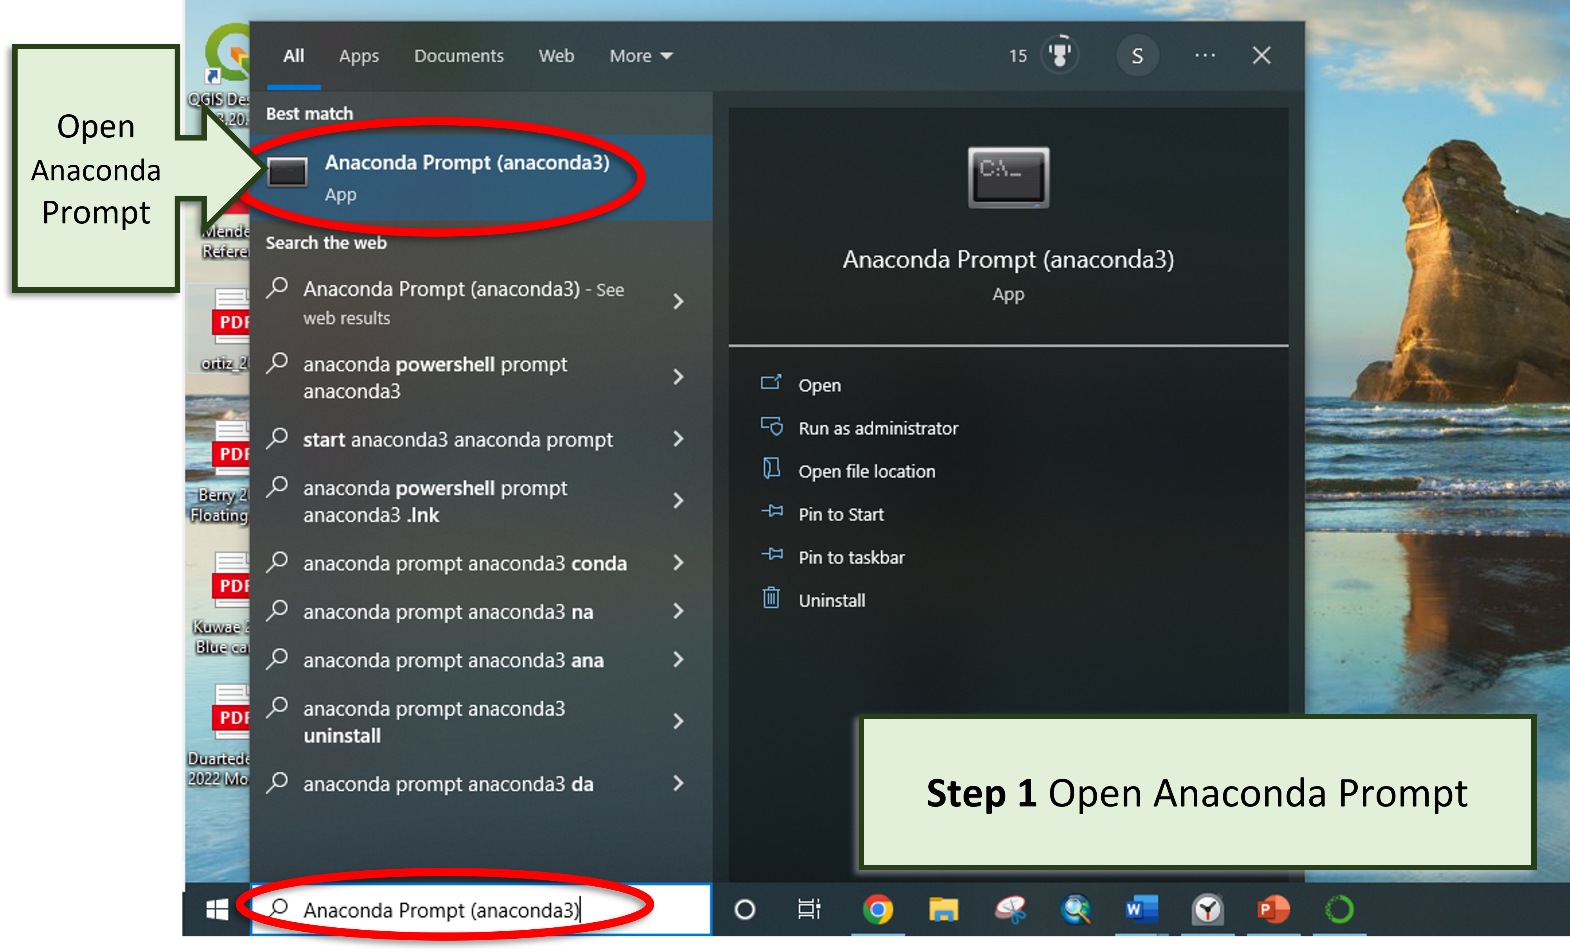
Open anaconda prompt by searching “Anaconda Prompt” in search tool bar.
Change Environments
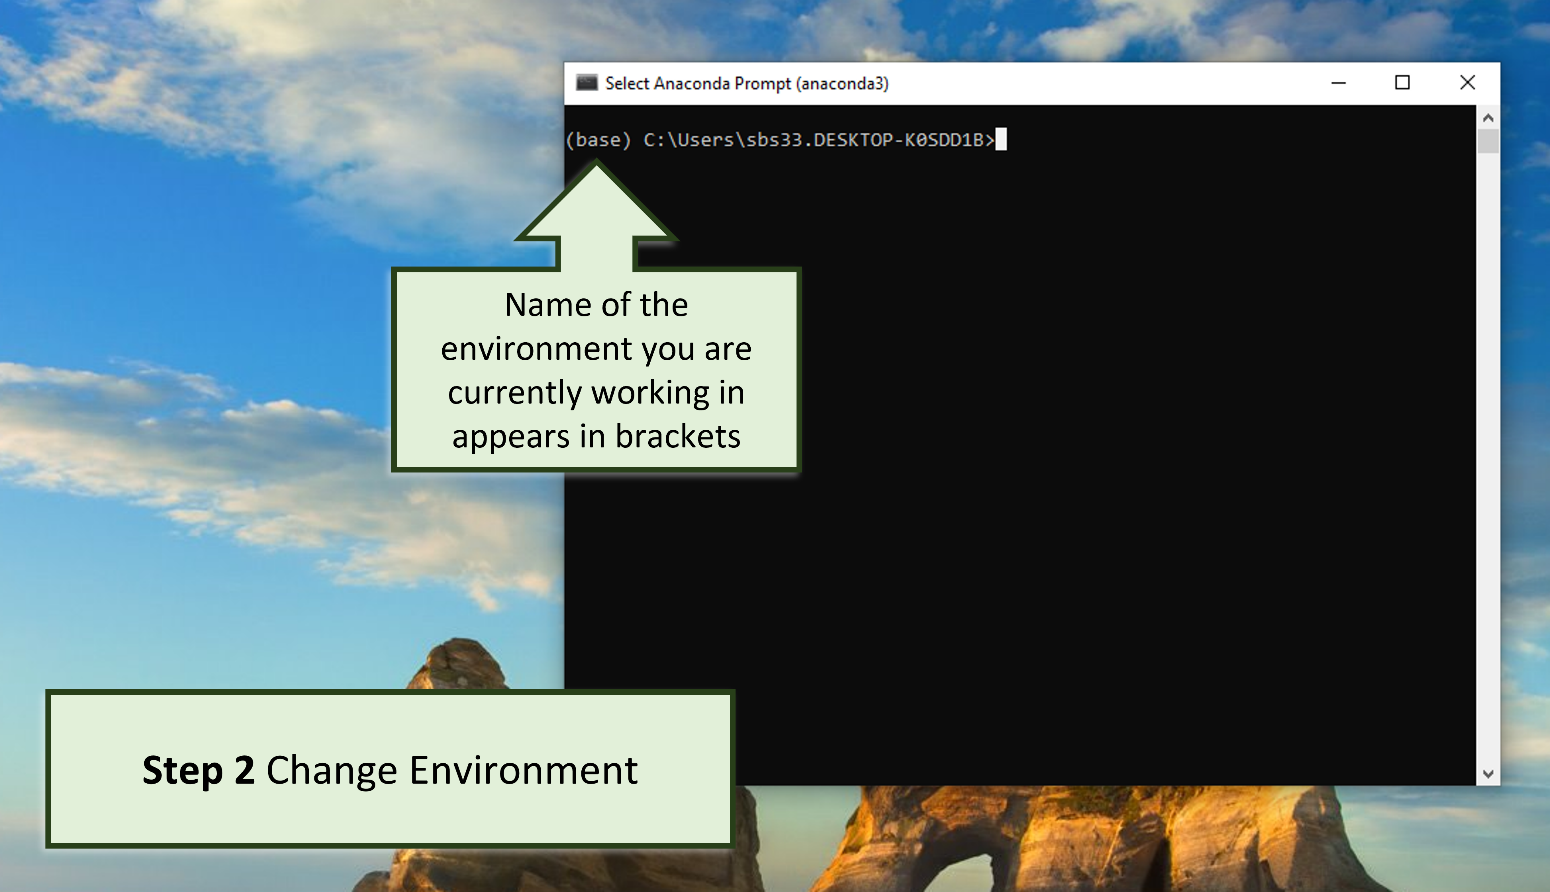
The default environment is called (base) which will appear in brackets before each line of text.
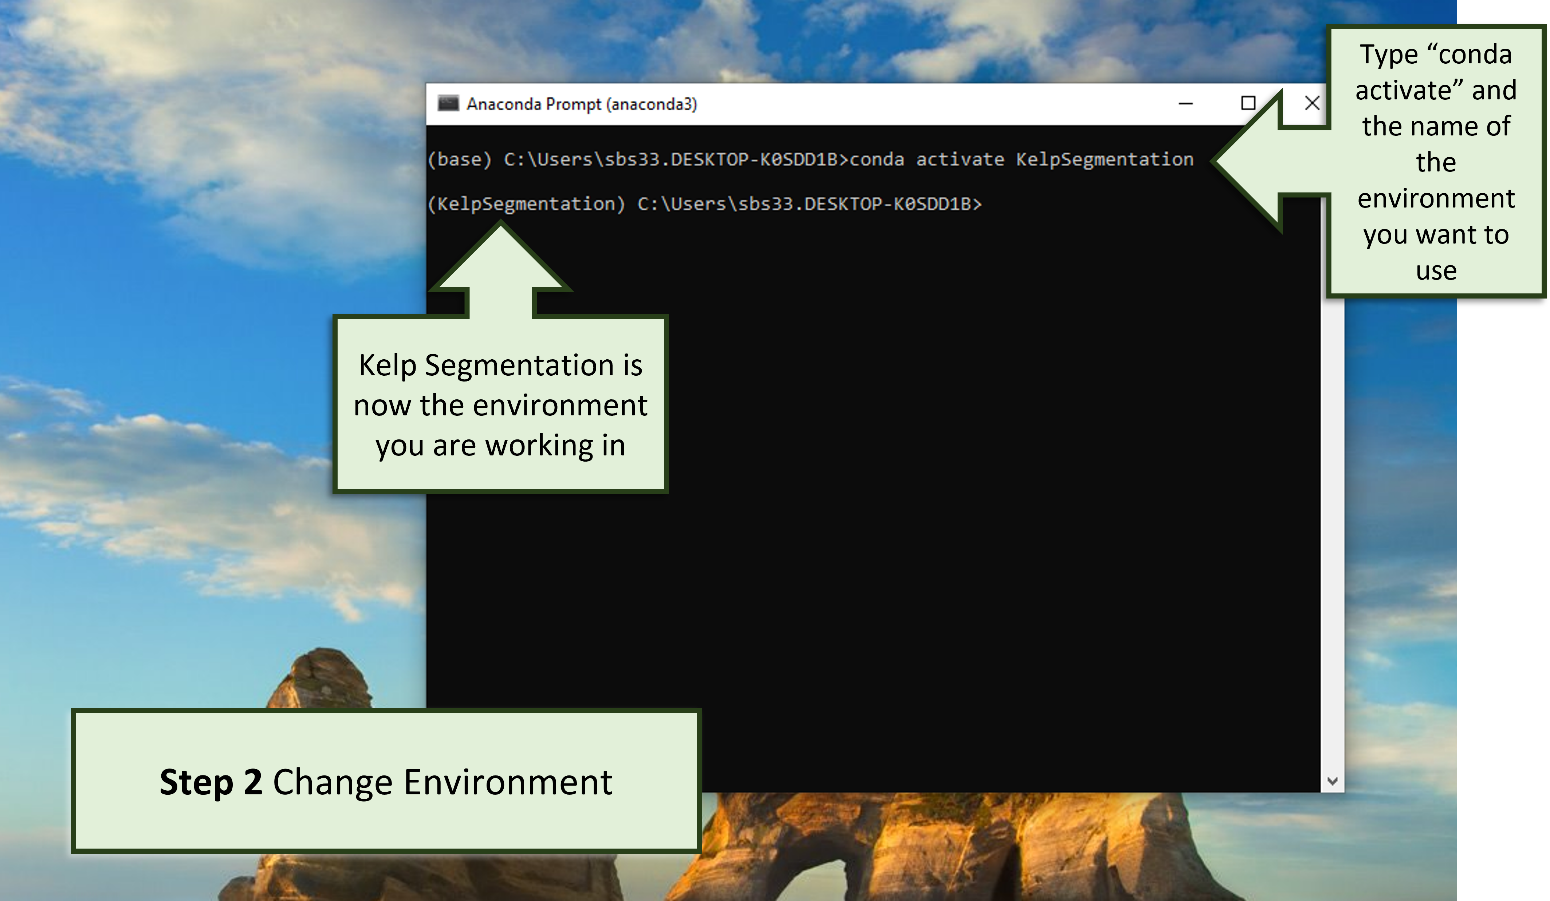
To change to the new environment that you created in Part 1, type: conda activate KelpSegmentation and press enter.
In this command, "KelpSegmentation" was the name that you chose for your new environment.
Now you will see that the environment has changed from (base) to (KelpSegmentation) as KelpSegmentation is now appearing in brackets.
Note
If you used a different name for your environment, be sure to replace conda activate KelpSegmentation with
conda activate <your-environment-name-here>
You can see a list of all installed environments by typing and entering the command: conda env list.
Run Segmentation Tool
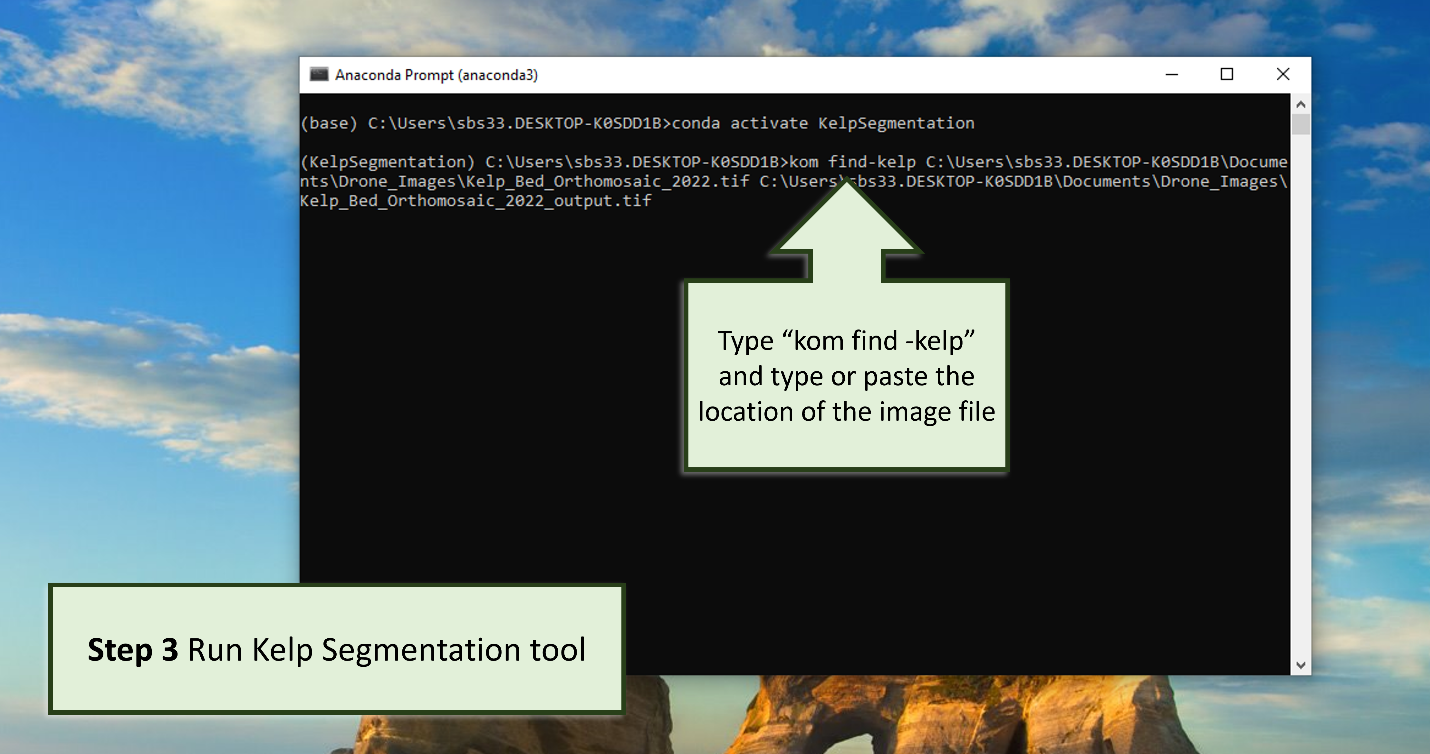
Type kom find-kelp and copy and paste the location of the image in which you would like to detect kelp. Add a space
and then type or paste the location you would like the output file to be saved on your computer with the name of the
output file.
In this example the orthomosaic to be classified is named “Kelp_Bed_Orthomosaic_2022.tif” and its location is in the C drive, documents folder, Drone_Images subfolder.
C:\Users\sbs33.DESKTOP-K0SDD1B\Documents\Drone_Images\Kelp_Bed_Orthomosaic_2022.tif
The output results will be sent to the same Drone_Images folder and will have the name “Kelp_Bed_Orthomosiac_2022_output.tif”, where .tif is the file type.
C:\Users\sbs33.DESKTOP-K0SDD1B\Documents\Drone_Images\Kelp_Bed_Orthomosaic_2022_output.tif
So, the entire command in the Anaconda prompt is:
kom find-kelp C:\Users\sbs33.DESKTOP-K0SDD1B\Documents\Drone_Images\Kelp_Bed_Orthomosaic_2022.tif C:\Users\sbs33.DESKTOP-K0SDD1B\Documents\Drone_Images\Kelp_Bed_Orthomosaic_2022_output.tif
Press Enter and wait for the segmentation to run; the time may vary depending on the size of the image.
Note
You can always get help documentation for the kom find-kelp tool by typing into the prompt kom find-kelp --help.
This help documentation is the same as what is shown under the :doc:Command Line Reference <./cli>.
Tip
If you manually type in the path to your file, use the <tab> key to have your operating system autocomplete the paths for you.
e.g., if you type kom find-kelp C:\\Desk, then press the <tab> key, your operating system should complete the
command for you so it reads: kom find-kelp C:\\Desktop.
If the partial path is ambiguous, tapping <tab> multiple times will cycle through the possible path options.
You can continue doing this as you type in the location to autocomplete the text for long path names. It is faster, and less error prone than typing the whole path yourself.

Once the processing bar is at 100%, you can open the results in an image processing or spatial analysis software such as QGIS or ArcGIS. Review the results for errors and edit as needed.
Part 2 Kelp Segmentation is now complete!
Continue to Part 3 to learn how to post-process the results.
Authors: Sarah Schroeder and Taylor Denouden